Every time I made a pouch, I wanted to make handbag with similar zipper. Usually bag zippers are attached to the lining and not to the main body. Somehow my idea was attach zipper to the main body including lining. Now that I am experienced enough to do any kind of adventures, this time I wanted to go ahead with that old thought.
This is the first time ever I tried to do a tutorial. So please bear with me. My main intention for this tutorial is to show you how to add zipper to the main body of the bag. That's why I didn't include small steps like adding pockets. However I added helpful links from other tutorials (very good ones) if you are interested.
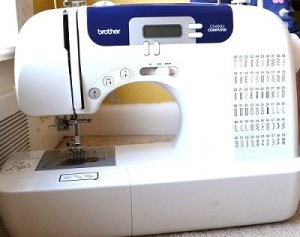
As my sewing machine didn't cooperate much, I was not in a position to take too many pictures while sewing. My stitches weren't picture perfect. Because of the skipped stitches, I had to double stitch many places. I wouldn't call it a complete tutorial. But I have made some attempts to make it clear how to make this bag.

I hope you know how to make a zippered pouch. If not, refer to very nice tutorials by Jenny at Missouri Start Quilt Co. or Crafty Gemini, or Melanie Ham. The basic idea for this bag is exactly the same.
Materials Needed:
Main Fabric - Nearly 1 yard (I used two colors (Red and green) half yard each). It will be used for straps and pockets.
Heavy weight Interfacing - I used Pellon 50 Heavy Weight stabilizer sew on interfacing to do some quilting. If you want to skip this step, use adhesive interfacing. Heavy-weight interfacing is better as it gives the bag some body. I didn't add batting to avoid it being very bulky.
Lining Fabric - Half Yard material of your choice. I used cotton fabrics throughout.
Zipper - Same (or 1 inch less) length as of the width of the bag -I used 15" length - I used zipper from my daughters old sleeper(Hooray for reusing!!!)
STEP 1:
I cut 6 strips of 2.5" width of fabric from both colors and stitched those together alternatively to get a piece of approximately 25"x15.5". Cut the lining fabric of same dimensions.

STEP 2:
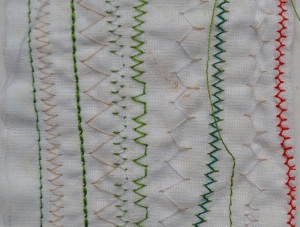
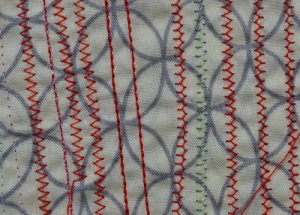
I quilted the main fabric in to the sew on interfacing. If you have stick-on interfacing, you can skip quilting. You can do some stitches to give the body some quilted looks. I used the regular presser foot for this step.


STEP 3:
Prepare your zipper with tabs at the end. All the above mentioned tutorials will give you clear guidance of how to do that.
Prepare your handles with the same interfacing or batting (for thicker handles). I prepared two 52" handles. I found out the problem with my machine at this step and completely forgot to take pictures. Instructions to this step can be used from any tote bag tutorials like this. You can use the lining fabric too (its your project) for the handles.
STEP 4:
Decide how many pockets and where do you want them to be. I decided that inside the lining fabric I needed one pocket with a zipper and another one without zipper. I referred to this tutorial from Melissa @ Happy Quilting for the zippered pocket inside the lining.
Zipper for the pocket was 5.5" long and I used 6"x 6" square pieces.


For the other lining pocket, I cut around 9"X 6" rectangle pieces. I gave slight folding while stitching that in to the place to give some wiggle room for my wallet.


I prepared and kept one more pocket to add outside the bag (6"x 6").

STEP 5:
I cut the main fabric and the lining in to half (make sure to measure twice before this step) and trimmed all 4 pieces in to the same size (in my case it was around 15"x 12.5").
Attach the handles to the main fabric as shown in the picture. Make sure to leave (not to stitch) around 1-2" from the top edge of the main fabric. Make sure to add the prepared pocket in between the handles. If you don't know how to do this step, Please refer to this video.


I am sorry for those little heads and hands peaking in between :-))...what to do??? I can't avoid those interruptions :-).
STEP 6:
Now gather all 4 pieces and prepare to sew the zipper. As any other zipper pouch, first lay the main fabric facing pretty side up, lay the zipper, wrong side facing up, lining fabric wrong side facing UP. Now double check that all pretty sides are touching each other , while making sure that handles are out of the way. now stitch along the top side (marked) using a zipper foot if you have one. I used the regular foot though. Gather everything together away from the zipper.

STEP 7:
Repeat Step 6, now considering the step 6 unit as zipper. Pretty side of the second main fabric facing up, step 6 unit's wrong side facing up, second lining fabric's wrong side facing up sew along the top edge. [Make sure to keep handles out of the way].
I used my little dress maker machine for all these steps and it didn't give very good stitches. I had to double stitch couple of times. That's why I didn't take pictures. Now, I wish pictures would have helped.
STEP 8:
Now while keeping the zipper open, gather lining fabrics to one side of the zipper and the main fabric to the other side. While preparing to sew around the edges, make sure handles are tucked in and zipper is open. Zipper teeth should be facing towards the lining. Make 4-5" long opening at the lining bottom and sew around the edges, with 1/2" seam allowance. Make sure to double stitch, which will make the bag secure.
After this step, I boxed the corners. I needed 4" width at the bottom. So I measured 2" from each corner (as you do with any tote bags) and sewed 4 triangles at all corners.

Black arrow in the picture shows the opening space.
STEP 9:
Now trim all edges and extra threads and turn the bag inside out..... ta da... you bag is ready :-). Finish the lining bottom with machine or hand. If I had the proper machine, I would have sewn along top edge, while making sure the handles are attached nice and neat and to make sure the lining is in place. But it has to wait until it gets fixed or until my new machine arrives. This little bag is nice and neat as it is.
Finished dimensions are approximately 14.5" wide and 11.5" tall (from top to bottom seam) with 4" bottom width.


Hope this will help someone somewhere in the world. Thank you for stopping by. Drop in your comments, if you gave it a try :-).
One more news!!!!!!!!! My new JUKI TL 2010Q will be at my door step any time by now :-))))))
Be good and be happy until my next post :-)
Jyothi
Linking this post to: 1. http://crazymomquilts.blogspot.com/
2. http://confessionsofafabricaddict.blogspot.com/